- Details
- By support911
- Main
Knit Aid - a different approach to teaching knitting skills
 When somone states "I want to learn how to knit", they almost always also state "I want to fix my own mistakes".
If the repair shown is beyond what you think you can repair, then you need help in understanding the knitted fabric.
It doesn't matter what method of knitting you use to create a knitted fabric. You can carry the yarn in your right hand or your left hand, work in the front or back of a stitch, call it German or Peruvian knitting, or use a knitting machine. All these different knitting methods produce the exact same knitted fabric. (A pattern will tell you what yarn, needles, gauge you need, but will never state a particular method of knitting.)
Yes, I will teach you to knit and I will use the method that is called American or English knitting. If you prefer a different method, please use that method. No matter what method you use, a knit two together will always lean to the right. The resulting fabric is the same for any method of knitting that you can use. Just be sure to review my method so you are aware of what you need to learn from each lesson.
Traditional knitting classes place little or no emphasis on how to identify a wrong stitch, why a wrong stitch occurs, how to fix that wrong stitch, or how wrong becomes right by turning that wrong into stitch patterns or techniques. Understanding how the stitches should look, will make understanding how to form the stitch much easier. That knowledge makes fixing a wrong stitch easier.
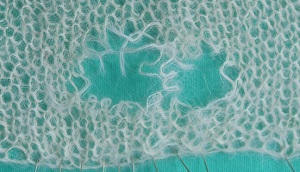
Learning how the yarn travels, how the stitches relate to each other, and how the stitches relate to the needle, will aid you in understanding the knitted fabric. This knowledge makes repairing the tear in the picture a doable repair.
This tutorial takes a multi pronged approach to aid you in your journey of learning to knit. I will explain how to make mistakes, and then show you what those mistakes look like. Then I will help you in fixing those mistakes. In this process you will have a gained an understanding of how to begin to fix the shown tear.
Want to see how to How to fix a Hole in Knitted Fabric?

- Details
- By Angela Scarola
- Main
Fix a Hole in Knitting
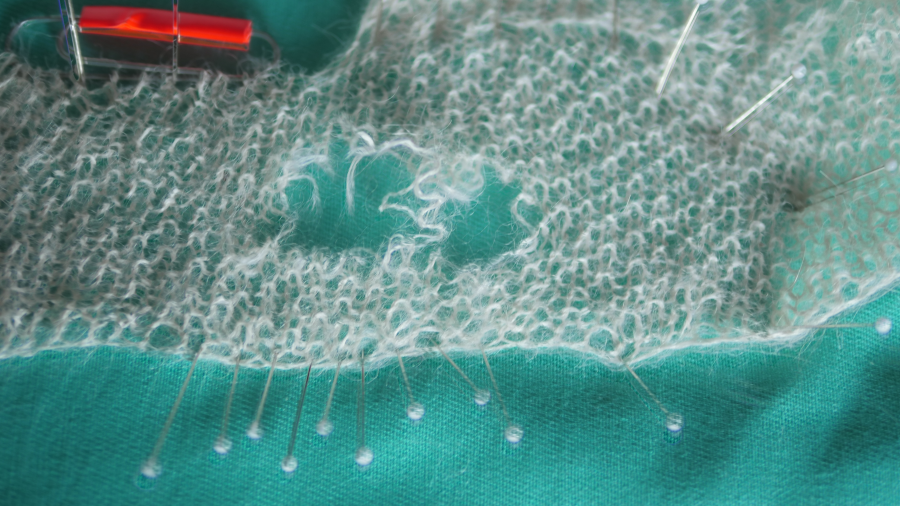
 Fixing the hole in this seed stitch piece was accomplished by using Duplicate Stitch to a seal the stitches to the left and right of the hole. Then forming new stitches where the yarn was missing. The last row was grafted.
First, I spread the tear out on a surface I could pin into - in this case a small quilt pinning board but a folded towel would also work. I tried to get the bottom row of open stitches in as straight a line as possible. Also try to maintain the distance between stitches that match your gauge.
Then I inserted pins into each open stitch of the bottom row in a straight line. These pins mark the last intact row of knitting.
I extended the pins for three or four stitches to the left and right of the open stitches, being really careful that those newly pinned stitches were indeed in the same row as the open stitches.
 Once those three or four stiches to the left and right of the hole are marked, I add pins to the stitches in the row immediately behind those marked stitches. These new pins are actually marking the row that will start the repair.
I normally graft from right to left and found the thought of having to graft in the opposite direction too confusing. So I folded a longer piece of yarn in half and then pinned that halfway point off to the right of the first right pin. I ended up with more ends than ideal but I maintained my sanity!
I threaded one end of the yarn into a blunt pointed needle. Removing the first pin to the right, I started duplicate stitching on the pin immediately behind the removed pin (removing that back pin is helpful but note which stitch you are working on). That second row of pins marks the first row of missing knitted stitches. As I finished duplicate stitching each stitch, I would remove the next front pin and duplicate stitch the next back stitch.
Once you reach the first open stitch, you now have to start forming new stitches. A crochet hook is helpful in pulling the yarn through to form the missing knit or purl stitch. Remove the pin, form the missing stitch, and then pin the new stitch in place. Try to maintain the loop size and spacing as you form the new stitches.
When you reach the double row of pins, switch to duplicate stitching for three to four stitches to the left.
For the second row, I used the second end of the repair yarn. Weave it up to the next row. Duplicate stitch and reform stitches as described above.
My repair required five rows of repair. I used a second length of yarn for rows three and four.
The last row was grafted so that the last repair row and the shown open stitches at the top of the picture were joined together.
Normally grafting replaces both legs of a stitch but I did cheat a bit on the grafting row. Seed stitch is a bumpy fabric so when I got confused, I made sure there was at least one loop through an open stitch to keep it from raveling. Your eye will look for that bumpy seed stitch look but will ignore a missing leg of a stitch.

- Details
- By Angela Scarola
- Main
Harry Potter inspired this website
This website is largely experimental. It started out as a "Learn to Knit" booklet so I just wrote about the topic that inspired me that day. As a result, draft articles appear with no apparent order.
I was also fascinated by the Harry Potter magical books and wanted to duplicate his experiences with those books. While technology has not completely caught up with the Hogwarts school books, I want to offer the knitter multiple ways of learning each technique using both the oldest and newest technology available.
Please note that many of the named topics are followed by curly brackets. This allows you to tell at a glance the status of that topic. If it is set to {empty} there is nothing written yet for that topic. Including the {empty} topics provides you with a rough outline of the topics that will eventually be covered.
If it is set to {pictures} then a drafted article is available to read but any intended pictures, videos, graphs are missing. Ideally the drafted articles are so clearly written that pictures would not be necessary!
Allowing you access to these unfinished areas allowing your greater participation in helping me fully cover each topic in as many ways as we can devise.

- Details
- By Angela Scarola
- Main
Landing Page
KnitAid - a different approach to teaching basic knitting skills
It does not matter what method of knitting you use to create a knitted fabric. You can carry the yarn in your right hand or your left hand, work in the front or back of a stitch, call it German or Peruvian knitting, or use a knitting machine. All these different knitting methods produce the exact same knitted fabric. (A pattern will tell you what yarn, needles, guage you need, but will never state a particular method of knitting.)
Yes, I will teach you to knit and I will use the method that is called American or English knitting. If you prefer a different method, please use that method. No matter what method you use, a knit two together will always lean to the right. The resulting fabric is the same for any method of knitting that you can use. Just be sure to review my method so you are aware of what yiou need to learn from each lesson.
Traditional knitting classes place little or no emphasis on how to identify a wrong stitch, why a wrong stitch occurs, how to fix that wrong stitch, or how wrong becomes right by turning that wrong into stitch patterns or techniques. Understanding how the stitches should look, will make understanding how to form the stitch much easier. That knowledge makes fixing a wrong stitch easier.
Learning how the yarn travels, how the stitches relate to each other, and how the stitches relate to the needle, will aid you in understanding the knitted fabric. This knowledge makes repairing the tear in the picture a doable repair.
This tutorial takes a multi pronged approach to aid you in your journey of learning to knit. I will explain how to make mistakes, and then show you what those mistakes look like. Then I will help you in fixing those mistakes. In this process you will have a gained an understanding of how to begin to fix the shown tear.
Want to see How to fix a Hole in Knitted Fabric?
Read how Harry Potter inspired this site!
Next Lesson: What you need...

